This tutorial will step through the process of creating a Pushdown Automaton using the simulation applet/application.
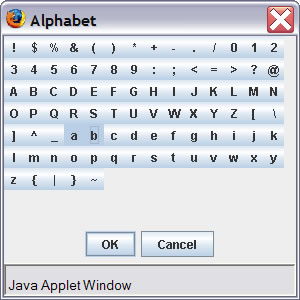
1. First we need to create the libraries for our language. To do this click on the Alphabet button and select the symbols for your tape alphabet.
![]()
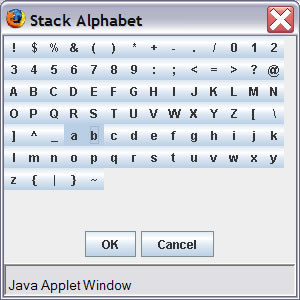
Then click on the Stack Alphabet button and select the symbols for your stack alphabet.
![]()
Now that we have the alphabets set we can start creating the states and tranisitions for our automaton.
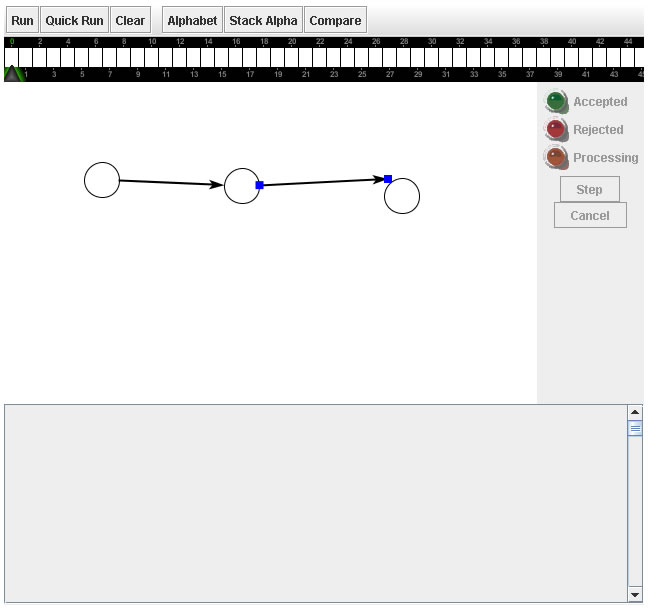
2. Create states by pressing Cntrl+click in the desired locations. After creation you can move the states by clicking and dragging them.
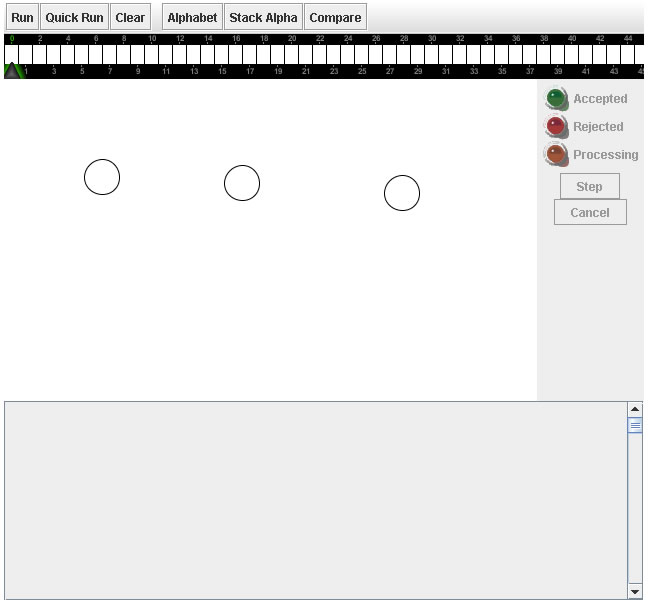
When the states are created you can add labels and descriptions to them by right-clicking on the states and selecting properties. Please note that it will aid in understanding the animations if you label all of your states.
3. Create transition arrows by Ctrl+clicking and dragging from the source state to the destination site.
Now that we have our states and transition arrows we need to label the arrows with the transition rules.
4. Add labels to the transition arrows by right-clicking on the arrow and selecting the edit symbols option.
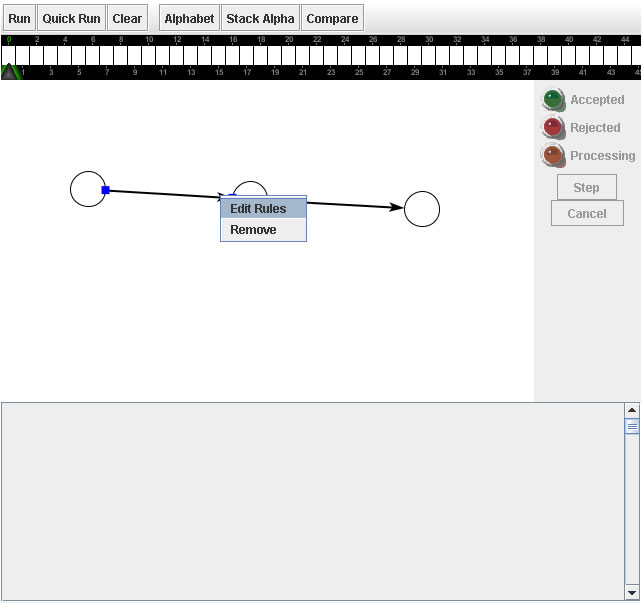
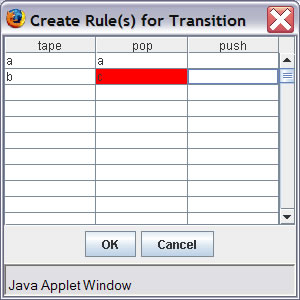
This should bring up a window containing a table with three columns named Tape, Pop and Push. In the first column of the table enter the tape symbol for your transition rule. Note you can enter multiple symbols here in the form a,b,c or a-c. In the second column enter the symbol you wish to pop off of the stack and in the third column enter the symbol you wish to push onto the stack.
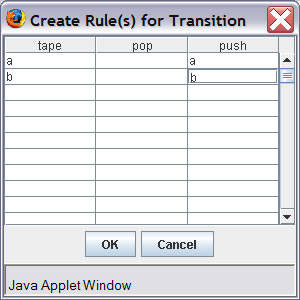
If you enter symbols that are not in the tape alphabet into the first column or in the stack alphabet into the second and third columns the cells will turn red upon exiting them or pressing the OK button. This is to keep you from creating rules that contain symbols not in the alphabet.
There is one inconsistency that you need to know about when creating transitions that will be fixed in a future release of this applet:
Now we select our start state and final state(s). This step can be done anytime after the creation of the states.
5. To select a state as the start state or as one of the final states right-click on the state and select the Start State and/or Final State options.
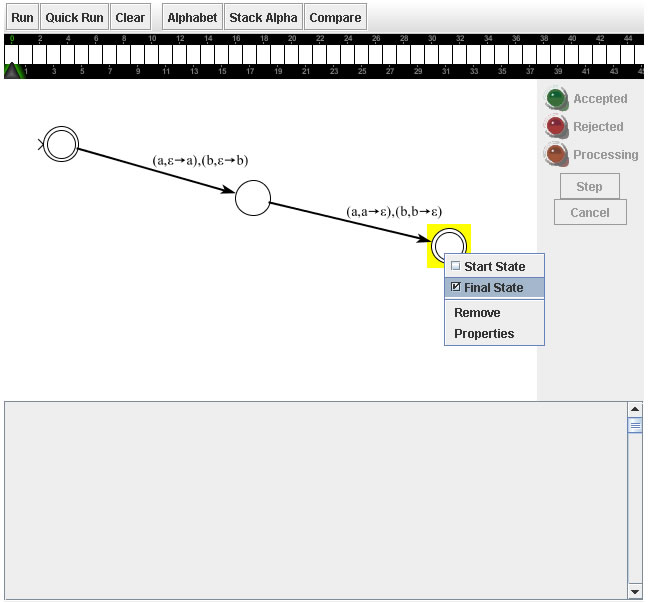
The start state will now have a > symbol pointing to it and the final state(s) will be marked the a double circle.
Now we are ready to use this automaton in a simulation.
Using the Compare button
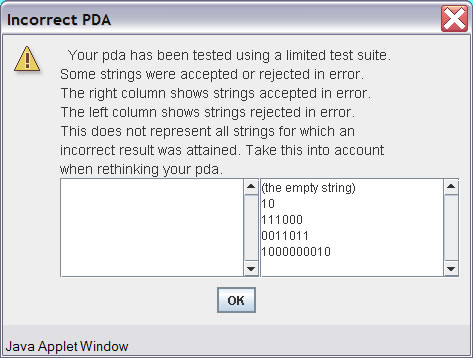
Clicking the compare button will run the PDA through a test suite to test its correctness. This feature only works in the Applet version of the PDA exercise builder, not in the standalone application.
![]()
If the PDA is found to be incorrect, a window will appear with a two lists of strings. One list will show the strings that were accepted that should have been rejected and the other will show strings that were rejected that should have been accepted.
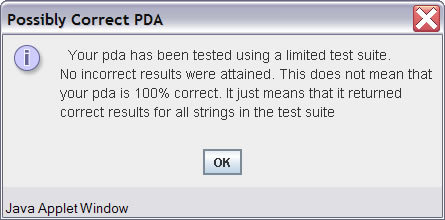
If the PDA passes on all the strings in the test suite a dialog will display showing that it passed all the tests. Note that this does not mean that the PDA is 100% correct just that it passed all the tests in the test suite.
Saving and Restoring
Saving and loading PDAs from files can be done in the application version by pressing either the Save, Save As and Load buttons. This functionality works in the standard way.
![]()
This tutorial is a work in progress, please e-mail at williamc@cs.montana.edu me with any questions/suggestions.